Showing posts with label recipe. Show all posts

Tuesday, October 23, 2007

RECIPE! Classic Hummus

I CAN'T FIGURE out how you could make this without a food processor. Perhaps with a lot of smashing and rapid wrist movement? I suppose. But this is really one for those of you with access to a blender or some other kind of knife propelled by electricity:

1 can garbanzo beans
1/3 cup tahini
3 garlic cloves
1 lemon
1 tbsp olive oil
1 tsp paprika
1 tsp cumin
salt + pepper

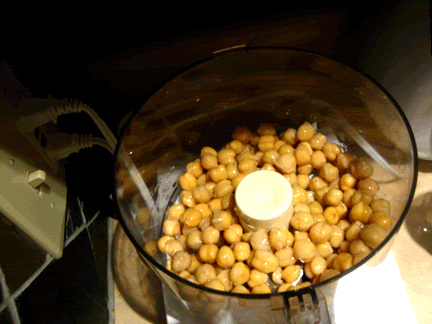
Combine in a food processor or blender the garbanzo beans (a.k.a. chickpeas, ceci beans), tahini, garlic (chopped in half), juice of one lemon, olive oil and spices to taste. Blend in bursts, stopping and checking occasionally. Blend to a thick paste.

A few helping hints: Reserve the water from your canned beans in case the hummus is too thick; add water in small amounts. Garlic can be used to taste--if you've got really fresh garlic, perhaps two cloves will do. You can do without the cumin, but don't skip it if you've got it. That's all for now.


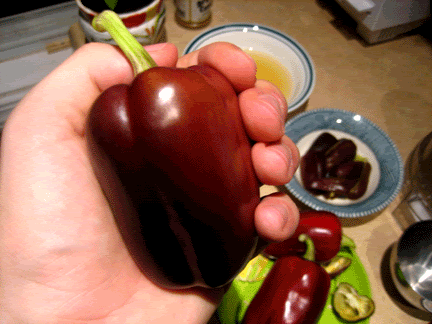
This is a really excellent recipe to experiment with. The only thing to remember is to be careful to maintain your consistency--if you add too much liquid, you'll need to add chickpeas to thicken the mix. We enjoyed this recipe with fresh purple peppers picked (finally!) from the plant that's been growing in our kitchen window since spring. Not to brag or anything, but they were pretty awesome.

Saturday, September 22, 2007

RECIPE! Raspberry and Blueberry Compote

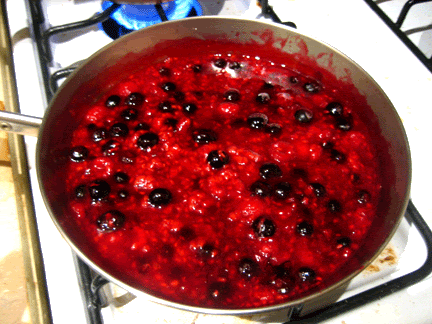
IT SEEMED APPROPRIATE to break fast with breakfast. Mint was observing Yom Kippur and had not eaten since yesterday at sundown so the choice was hers; a big fan of the crepes we made last week, her choice was no surprise. The filling? Raspberries, blueberries and a little Chambord:

1 1/2 cup raspberries
1 cup blueberries
3 tbsp Chambord liqueur
1/3 cup tangerine juice
1 1/2 tsp water
1 1/2 tsp cornstarch
1 tbsp lemon juice

In a small bowl or measuring cup, mix cornstarch and water. Combine Chambord and juice in saucepan and bring to a simmer. Slowly add cornstarch mixture and mix or whisk well. Allow to simmer for one minute. Add lemon juice and remove from heat. Add berries, mix, and allow to sit while you make the crepes.

Spoon into crepes, fold, and decorate as desired

Substitute to your heart's content. Orange juice for tangerine juice, blackberries for blueberries, brandy for Chambord--this or that for whatever combination your looking for. Apples, cranberries and brandy would be a good idea; bananas, nuts and amaretto would be tasty too. Oh, the combinations are endless.

Friday, September 14, 2007

RECIPE! Spinach & Leek Crepes

THE ORIGINAL RECIPE called for artichokes, but Mint does not eat artichokes. So, spinach it is! No complaint here. Please do buy the spinach fresh, though, and blanch it in some boiling water rather than resorting to the canned stuff if at all possible. These make a quirky dinner and (being delicious and very portable cold) a pretty good breakfast too. Also, this was my first attempt both making crepes and cooking with leeks--I look forward to doing both again. You will want to assemble:

1 cup all-purpose flour
1 1/4 cup milk

1 egg
Pinch of Salt
Vegetable oil
1-2 cups cooked spinach
1 large leek
1/4 cup margarine
2 tbsp flour
2 tablespoons milk
5 oz. goat cheese
2 eggs, separated
Nutmeg + Salt + Black Pepper

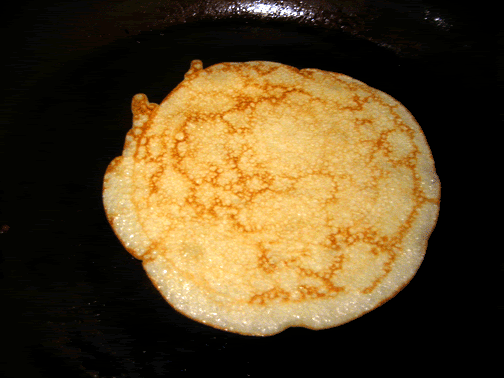
First, the crepes: Blend flour, milk, egg, and salt in a food processor or blender (if you do not have such a machine, whisk very, very well by hand--the batter should be quite runny). Brush a medium-sized frying pan with a thin layer of vegetable oil and bring to medium-high heat. Drop less than 1/4 cup of batter into pan with one hand; with free hand, quickly swirl batter around to coat the pan as thinly as possible. Cook both sides briefly to light brown. Set aside under a moist, clean towel and keep warm.

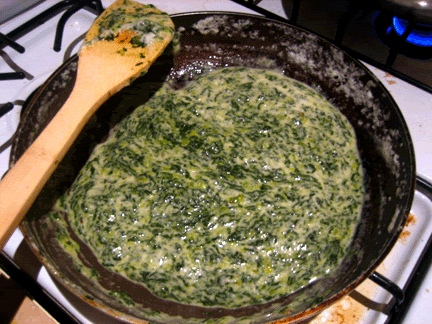
For the filling: If you buy fresh spinach, blanch the leaves by dropping them into a pot with a few inches of boiling water and simmer until just tender. Drain well, chop. Then, cook spinach with thinly sliced leek in butter over low heat for approximately 12 minutes. Mash with the back of a spoon and season well. Stir in flour and cook for one minute. Remove from heat and add milk, cheese and nutmeg. Cool and add egg yolks. In stainless steel bowl, whisk egg whites until they form soft peaks and carefully fold into spinach mixture.

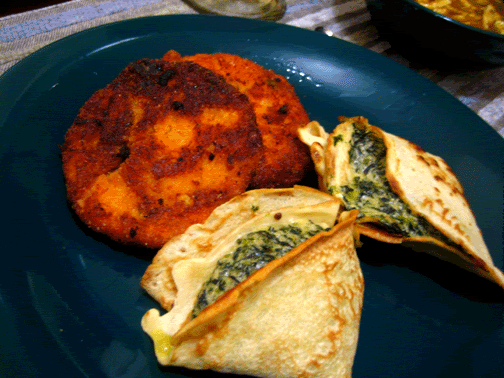
Fold crepes in half twice and spoon spinach mixture into crepe pocket. Set filled crepes into lightly greased baking dish and bake for about 15 minutes in oven at 375-degrees. Serve hot.

RECIPE! Yam Fritters

SWEET AND SPICY, these fried yam fritters are a delicious side dish or appetizer. Add some crushed red pepper or a few extra chilies if you want more than a hint of hotness. And be sure to let the batter cool quite a bit before attempting to form into small patties with your hands--the mixture will be very soft. You'll need the following:

4 medium yams
2 eggs
1 tomato, chopped
3 tbsp scallions, chopped
2 green chilies, chopped
1 shallot, chopped
Milk
Salt + Pepper
Garlic Powder
Bread Crumbs
Flour
Vegetable Oil


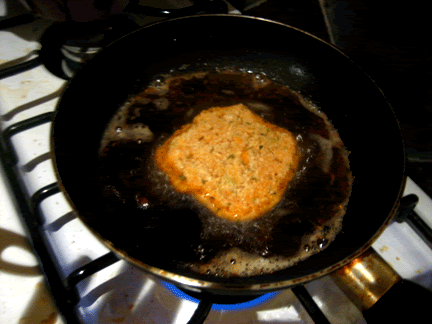
Peel yams and cut into chunks. Boil in salted water for 20-30 minutes until tender. Drain and mash with a small amount of milk and two tablespoons of beaten eggs. Add tomato, scallions, chilies, and shallot. Season well, mix thoroughly. With well-floured hands, form mixture into small round fritters. Dip fritter entirely in beaten eggs and coat with bread crumbs. Fry about 4-5 minutes until golden brown.

Wednesday, September 5, 2007

RECIPE! Hot & Sour Chickpeas

KNOWN IN INDIA as khatte chole, this easily-made dish requires little work outside of filling a big pot and squeezing a lemon. It freezes well and makes a great lunch--just refresh the dish by squeezing a bit of lemon over it and enjoy hot or cold.

12 oz. chickpeas
4 tbsp vegetable oil
2 large shallots, chopped
2 small tomatoes, chopped
1 tbsp ground coriander
1 tbsp ground cumin
1 tsp ground fennel
1 tsp ground cinnamon
2 green chilies, seeded and sliced
1-inch piece ginger
1 lemon

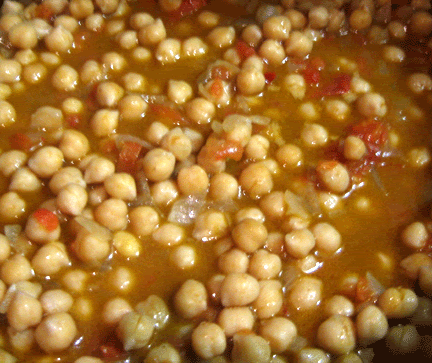
Use dried chickpeas if possible. Soak overnight in plenty of water, simmer for 60-90 minutes until tender and reserve liquid; if using canned chickpeas, rinse and drain well. Heat oil in large casserole dish. Reserving two tbsp of the shallots, frying the remained over medium heat for 4-5 minutes. Add tomatoes, lower heat. Stir for 5 minutes and mash tomatoes into a paste. Stir in coriander, cumin, fennel, and cinnamon--cook for 30 seconds. Add chickpeas and one cup of reserved liquid. Salt, cover and simmer for 15 minutes.

In small bowl, mix reserved onions, chilis and juice of one lemon. When chickpeas are ready, mix in lemon juice mixture, stir well and eat immediately.

RECIPE! Corn & Goat Cheese Pockets

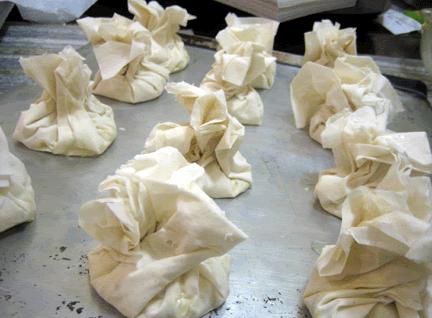
POCKETS, PURSES, MONEYBAGS--these delicious little filo dough pouches could be called many different things, but they're also: Simple.

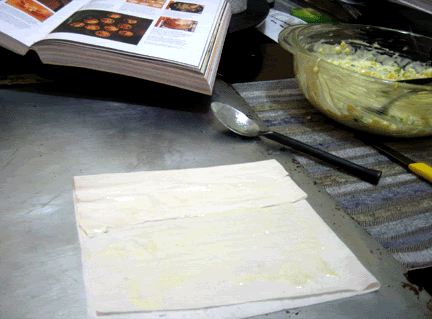
This recipe requires no fancy machines or daunting techniques, just a lot of patience, some table space and a little planning--the filo dough will likely be frozen when you buy it, so you'll need to allow it a day in the fridge to thaw. Then moisten yourself some paper towels and get started:

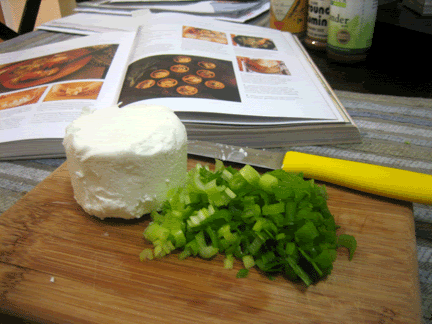
2 ears of corn
4 oz. goat cheese
1 egg, beaten
2 tablespoons milk
3 scallions, chopped
Ground black pepper
8-10 small sheets filo pastry
1 cup butter, melted

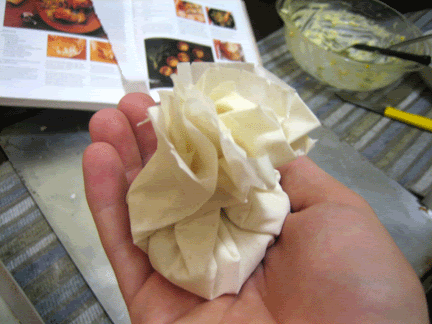
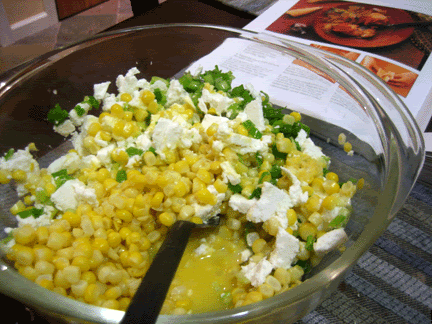
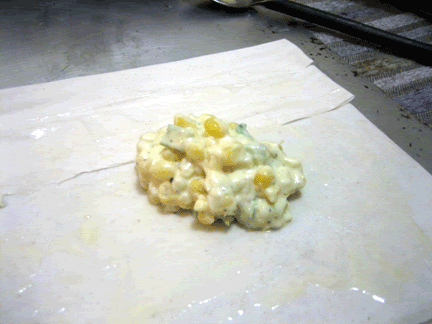
Boil the corn in salted water until tender. In a large bowl, mix the corn and goat cheese. Add egg, milk (I used soy milk to successful effect), scallions and ground black pepper. Stir it up. Take a large sheet of filo dough and cut (and/or fold) as needed to make a square. Brush with butter and fold the large square into a smaller square--about 4-5 inches wide should be a good size. Drop a small spoonful of the corn mixture in the center of the filo square. Pull up the edges and squeeze around the filling to make a pouch-moneybag-purse-pocket-type pastry. Place on buttered cookie sheet, brush once again with butter, and cover with a damp cloth or towel to await more of its corn-pastry brethren. Bake 'em all at 375-degrees for 15 minutes or until golden.


NOTE: Keep your unused filo sheets covered with a damp cloth or paper towel to avoid them drying out. No one likes a brittle filo sheet. People do, however, enjoy different kinds of cheeses. Goat cheese or feta cheese are certainly two tangy options, but Parmesan or cheddar would be interesting too. That said, corn could be swapped for roasted eggplant or spicy chickpeas, and scallions traded for leeks or shallots. Go nuts, for all I care.

Recipe makes a bunch. Don't worry--you'll eat them all.


Thursday, August 30, 2007

RECIPE! Classic Pesto

A SWEET SMELL wafted through the office this afternoon. Several folks started a communal attempt to place the scent, but Briana and I suspected the same thing and kept our mouths shut. After all, one doesn't normally expect basil to barge into the office on a quiet Thursday afternoon. But basil it was, or at least it smelled like.

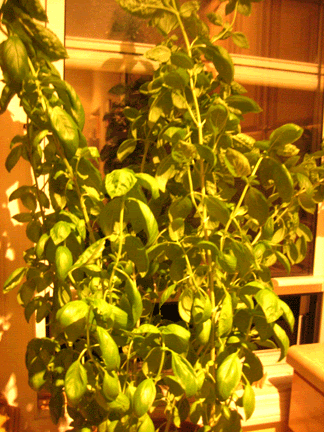
What business does basil have on the 33rd floor of the Hearst Tower? None that we know of, but it certainly served as inspiration. With six now-rather-large stalks of the stuff shooting up towards my kitchen ceiling, the time had clearly arrived to quit plucking off leaves one-by-one and go for some gusto--time for pesto!

This is not really much of a recipe but it's far less intensive than the exceedingly authentic Italian technique offered by Heidi over at 101Cookbooks.com, which I've admittedly been meaning to attempt for some time. For lack of a proper mezzaluna, I'll settle for a food processor. As for the rest of it:

Pine nuts
Basil leaves
Olive oil
Garlic
Salt
Pepper

I'm sorry, you wanted exact measurements? Well I don't have those. I didn't use them, so you don't have to either. A few pointers, though:

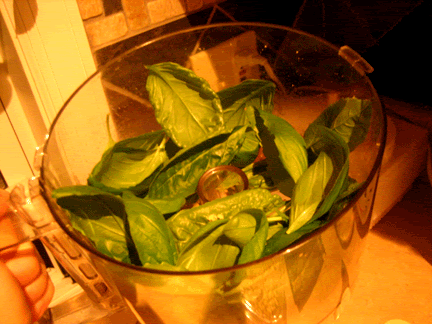
As 101Cookbooks points out, chopping is preferred to processing because it "prevents the ingredients from becoming a completely homogenized emulsion or paste." You can, however, take steps to keep your pesto from stooping to such slush even when utilizing electricity and a fast-spinning knife. First, let your basil leaves dry fully after rinsing them. Second, don't blend for too long--keep the bursts quick and as short as possible. Third, chop up the pine nuts with a little bit of garlic first, then adding the basil leaves and chopping very briefly until the leaves are just broken down. Drizzle a little olive oil, throw a bit of salt and pepper over the mixture, and quickly chop once more. Done and done.


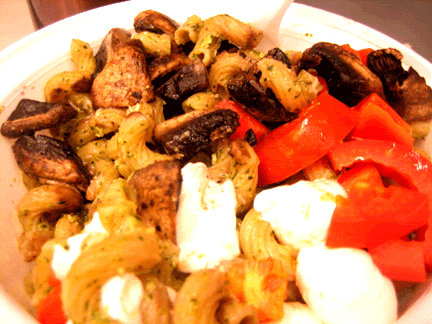
I used thick spirals of whole wheat pasta for this, and threw in some chunks of tomato and mushrooms along with small mozzarella balls and brought the leftovers along with me to work the next day. There was even pesto enough leftover to freeze for another day. The basil, of course, is still growing strong. I'm gonna need some more inspiration.

Monday, July 23, 2007

Adventures in Korean Food: Pa Jun, Take 1

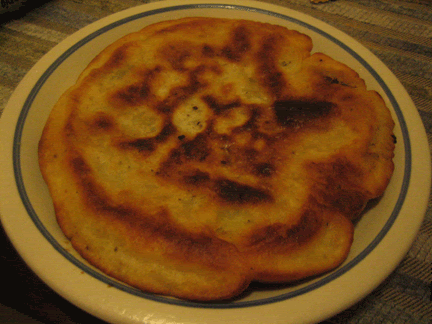
AN ODD COMBINATION of Jeanie and Becky conspired to foster my newfound love for Korean food. A few years ago, it was Jeanie's office-talk of kim chee. Becky then returned from Seoul raving about bi bim bop. After recently having enjoyed the latter, I joined Jeanie in Koreatown for the former, and my obsession was complete. Jeanie's mother sent me the Cha family recipe for pa jun the next morning:

3/4 cup all purpose flour
1/4 cup rice flour
5 green onions
Water
Black pepper
Vegetable oil

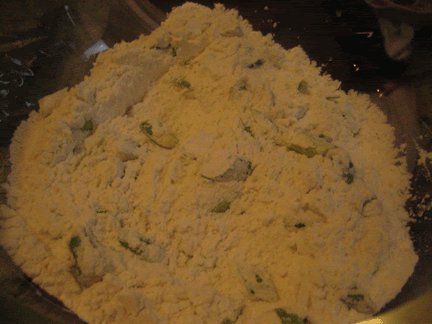
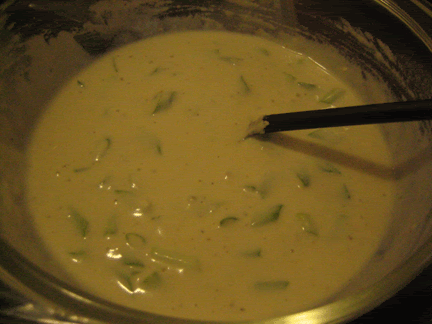
"The secret to this recipe," wrote Jeanie's mom, "is to use very cold water," for a super-crispy texture. With this in mind, I put a chunk of ice in a glass of water and left it in my freezer while I sifted the flours and sliced the green onions (diagonally, into 1 1/2-inch pieces), then stirred all throughly with my super-cold water and pepper. Um, how much water?

On this matter, Mama Cha instructs to add water, "until the mixture is the consistency of thin pancake batter." This takes some fine-tuning, which is why this post is titled "Adventures in Korean Food" and not "RECIPE! Pa Jun." I used one cup of cold water. I felt this produced a "thin pancake batter" consistency. Of course, there's yet the matter of cooking the pa jun, so we're not out of the woods just yet.

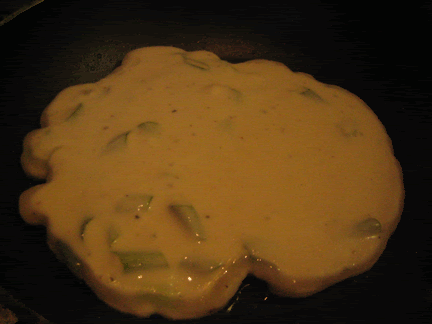
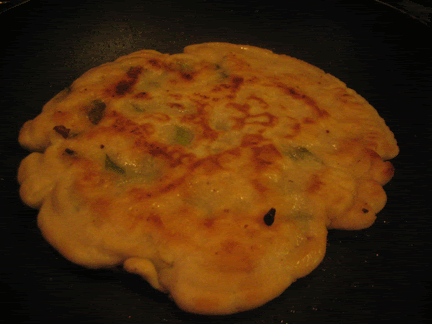
Cooking is simple enough. Use enough vegetable oil to "thinly cover" the surface of your frying pan, heat the pan on medium-high, and drop in half the batter. Cook to golden brown; flip and cook other side accordingly. Keep the heat low to prevent burning. If this sounds familiar, the informally translated name for pa jun, "Korean pancake," suggests why.

My pancakes turned out a tad bland and a little too sticky. The first of these concerns was expected--I used no salt, seasonings, or the more traditional kim chee (spicy fermented cabbage) or marinated seafood on my first try; I tried a little garlic powder, salt, white pepper, and red pepper in the batter and the fried the second of my two attempted pancakes with a little sesame oil to boost its flavor.

As for the "too sticky," it seems to me that I need to use more water. I'll notch up my almost-frozen liquid content to 1 1/4 or 1 1/2 cups next time and see how that works. After that, all I need to do is chop some cabbage, buy some glass jars, and pickle me some kim chee. But that's an adventure for another day.

Thursday, July 12, 2007

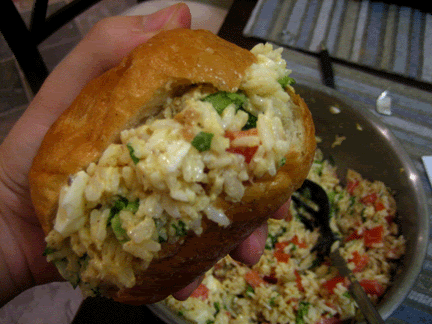
RECIPE! "Eggsestential" Chicken Salad

THIS RECIPE NEEDS a better name, perhaps, but my uncle's sarcastic moniker has stuck since no one else in my family has come up with anything better. Chicken-less Chicken Salad? A bit obvious, not to mention redundant. Egg salad? Not by any definition of the stuff. So, like it or not, "Eggsestential" Chicken Salad it is for now.

This recipe is also the first in what will hopefully be a growing list of work-friendly meals, as in: make it the night before, bring the leftovers along for lunch the following day. It's all part of my attempt to save some cash and eat well. An actual written recipe for this creation has never existed, so the following is a list of improvised ingredients inspired from the fashion in which my mother has previously combined them, or those like them:

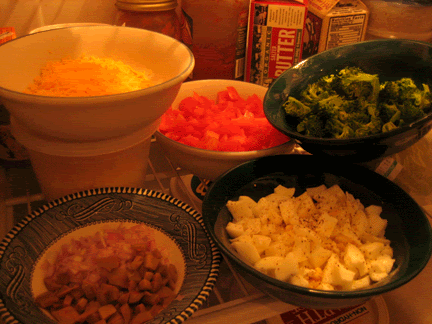
3-4 cups cooked rice
4 hard-boiled egg whites
3 plum tomatoes
1 head of broccoli
1 shallot
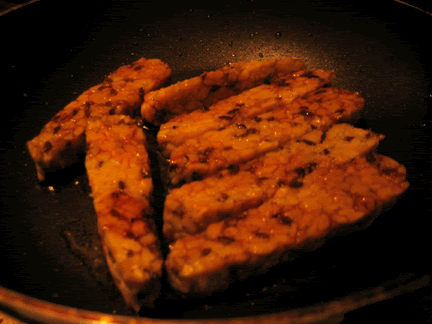
1/2 cup chopped, cooked tempeh
1/2 cup grated cheddar cheese
+ 1/4 cup grated Parmesan cheese
1/2 cup dijon Nayonaise
1/4 cup of olives
Fresh basil, chopped
Salt & pepper

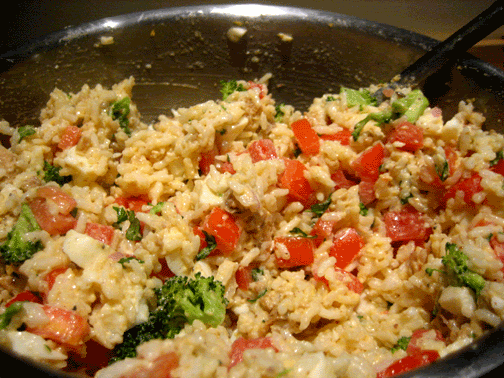
Chop well tomatoes (remove seeds), broccoli (cooked, if desired), shallot, and olives; cook tempeh and chop into small pieces; grate cheese. Set all aside. Cook rice (Note: About 1 1/2 cups uncooked rice yielded more than enough for this recipe). Mix rice and all ingredients in large bowl. Add Nayonaise and stir well, adding more if needed. Wash and chop a small handful basil leaves; mix in and season to tase. Serve on a roll, sliced bread, or whatever-- hot or cold.

Easy (if somewhat time-consuming) to make, and delicious warm or cold, it's a great recipe to take to work, a picnic, a barbecue, etc. Using Nayonaise, a soy-based mayo, keeps the nutrition level leaning towards healthy, although the cheese and (when fried) tempeh threaten to spoil the effort. Perhaps I'll work on a non-fried way to cook the tempeh.

Feel free to improvise this list. The basil was used mostly because we have some growing in the kitchen (which was an amazingly sweet inclusion). If making to be consumed by a crowd in one sitting, I would probably include avocado. Pistachios or celery would add some crunch. Using the hard-boiled egg yolks would probably create a more savory flavor; plain Nayonaise and honey, a sweeter one. Enjoy!

Friday, June 22, 2007

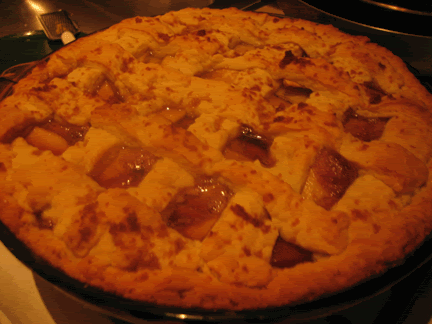
RECIPE! Pear & Blackberry Crostata

PRIOR TO MAKING this recipe I'd never before heard of crostata. Or so I thought. Apparently, I've eaten them with some frequency. After some online research, crostata turns out to be little more than an Italian quick-fix recipe for a more labor-intensive pastry--a tart. Score another point for Italian home-cooking.

Truth be told, this recipe looked anything but easy when I first saw at it. Making a pastry crust from scratch seemed like an awfully intricate and complicated task, and not one I thought myself ready for. The result, however, was a surprisingly simple process so very far less daunting than it seemed and a terrifically impressive dessert that's fairly hard to mess up. It's really worth a shot for anyone who doesn't bake often but wants to look good doing it. Locate the following:

2 cups flour
1/3 cup sugar

+ 1/4 cup sugar

1 1/2 tsp baking powder
2/3 cup butter
+ 2 tbsp butter, melted
1 egg, slightly beaten
1/3 cup milk
2 tsp shredded lemon peel
1 tsp vanilla
3/4 cup blackberry preserves or jam
4 medium peeled, sliced pears

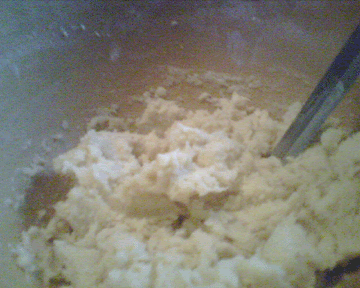
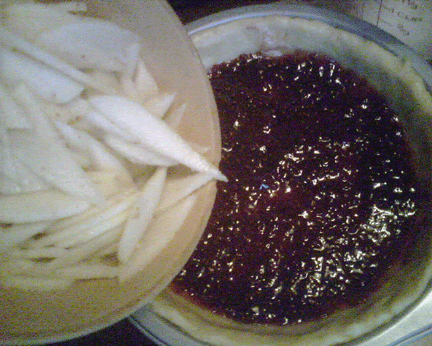
1. In medium bowl, stir together flour, 1/3 cup sugar, and baking powder. Using a pasty blender (or: two knives cutting in opposite directions--it helps if the butter is not too cold for this but it absolutely cannot [read: cannot] be warm and/or melting), cut in 2/3 cup butter until the mixture resembles coarse crumbs. Make a well in the center of the flour mixture.

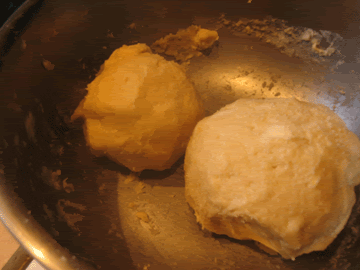
2. In small bowl, mix egg, 1/3 cup milk, 1 tsp lemon peel, and vanilla. Pour mixture into flour mixture, stirring until moistened. Knead gently until smooth (keep hands well- floured). Separate one-third dough, set aside; pat remaining two-thirds into bottom and up sides of a 10-inch tart pan. Spread blackberry preserves evenly over pastry in tart pan.

3. If you have the space and a rolling pin, turn out the remaining dough on a well-floured surface into a 9-inch circle. If you live in New York City (read: have a kitchen the size of a shoebox), sprinkle flour on a plate, covering it well. Take up the 1/3 remainder of dough in well-floured hands, and work dough into a flat circle as large as is easily obtained, attempting for 6-7 inches in diameter. Set on floured plate and lightly work outwards to full-size; place in freezer.

4. In a large bowl (this can be the now-empty dough bowl), toss together pears, 1/4 sugar, and 1 tsp lemon peel. Arrange pear slices over preserves in tart pan. Drizzle with melted 2 tbsp butter. (Tip: wait to peel/slice pears until this step--the dough firming in the freezer will be easier to work with next step.)

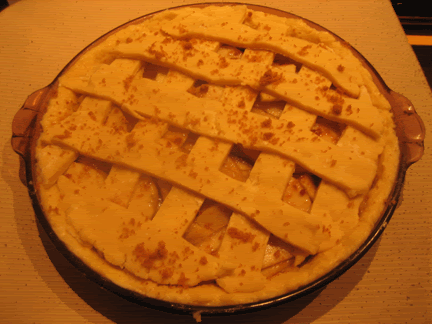
5. Remove your chilled, flattened dough on well-floured plate from freezer. Cut into 1/2-inch wide strips. Arrange strips over pears in a lattice pattern. (Looks fancy, right?) Brush lattice with additional milk; sprinkle with coarse sugar. Bake in preheated oven for 45-50 minutes at 375 degrees.

Cool tart in pan for 30 minutes, serve warm.
(Tip: if particularly juicy, you can chill your crostata fully in fridge after allowing it to sit out its 30 minutes in pan.)


I felt like adding those notes in italics within the body of the recipe instead of here post-recipe as is MEF! custom because some of those points are rather important--they make working the recipe significantly easier, cleaner, and more successful. So, there you go. The crust of this thing is ridiculously rich (almost a cup of butter will do that), tastes like you spent way more time on it than you did, and the lattice-work looks like you are way better at baking than you are. Not too bad for not too much work.
Thursday, June 14, 2007

RECIPE! Pumpkin Cookies

THESE LITTLE BUGGERS show up every year around the Holidays. At least, at my grandparents' place they do. Their origins are slightly uncertain, but I suspect my grandmother had something to do with it since the recipe, as it was given to me, came with a warning: measurements are tripled. Ah, nothing like cooking with math.

The astute among you will be quick to point out that presently we are in the month of June, following up with a question about why I would be presently making a Holiday recipe. Well, the recipe is being made now because it was passed along to me yesterday, because it was one my grandmother made frequently, and because it was two years ago today that my grandmother passed along. All things considered, it seemed appropriate that I celebrate her memory in food, and when celebrating someone's memory in food it is always advisable to do so with dessert. I'm pretty sure that's how everyone would have wanted it.

I decided to buy the more specific ingredients at Whole Foods in Union Square, not because I necessarily think that the vegetable shortening and canned pumpkin are better at Whole Foods, but because I was already in the city and attempting to buy specific things like shortening and pumpkin at Polish stores in Greenpoint is mind-numbingly difficult. So, however you like, gather the following, and don't worry this recipe is -not- tripled:

1 cup shortening
1 cup sugar
1 cup pumpkin

1 egg
1 tsp baking soda
1 tsp cinnamon
1/2 tsp nutmeg
1/2 tsp salt
2 cups flour
1 cup nuts

3 tbsp butter

4 tsp milk
1/2 cup brown sugar
1 tsp vanilla
1 cup powdered sugar

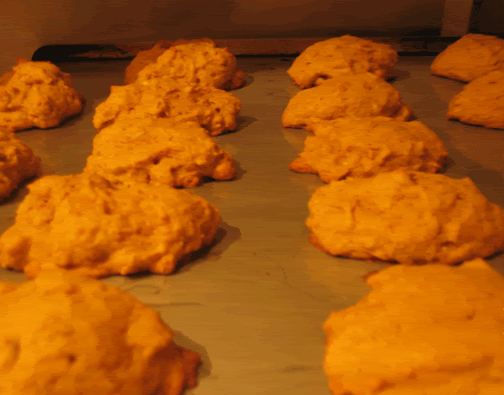
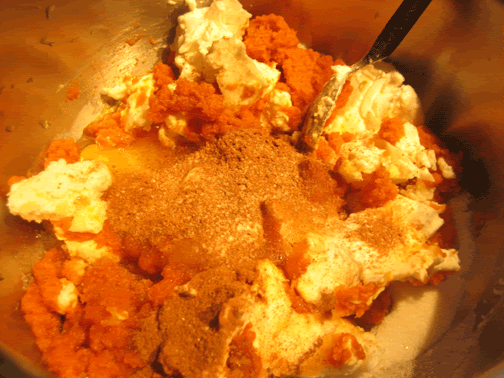
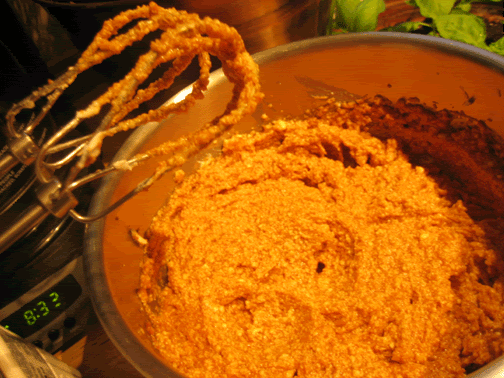
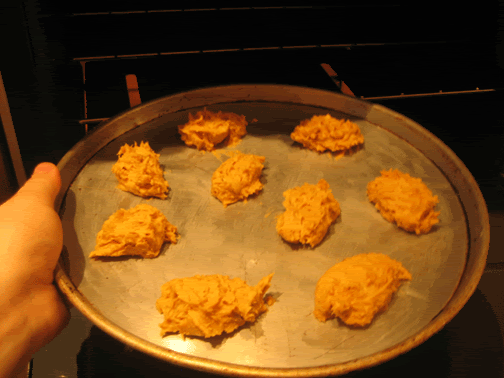
To make cookies: combine in large bowl shortening, sugar, pumpkin, egg, baking soda, cinnamon, nutmeg, and salt. Blend ingredients well, gradually adding flour. Spoon batter onto lightly greased cookie tray and bake at 350 for 10-15 minutes, or until brown at edges. Remove from oven, remove from tray, allow to cool. To make frosting: in bowl, combine butter, milk, brown sugar, and vanilla. Blend ingredients well. Fold in powdered sugar; blend well. Spread frosting on cooled cookies. Eat many.


These cookies keep really well. They taste like little bites of pumpkin pie. Which is probably how they've come to be known in our family as pumpkin cookies. Go figure. This recipe makes about two dozen cookies. Or if you really want to make them like my grandmother--triple the recipe.

Wednesday, June 6, 2007

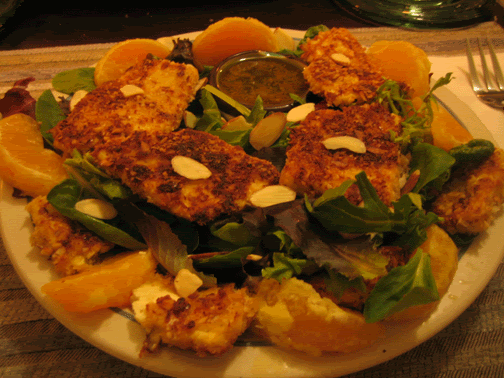
RECIPE! Almond-Crusted Tofu with Mixed Greens

MINT SIGNED UP for a handful of free magazine subscriptions almost a year ago. When the "free" period ran out, she cancelled them. The magazines, however, continued to show up at her dad's doorstep. Upon investigating, Mint found no unusual deductions on her credit card, but she also couldn't find any reason she should be still receiving the magazines. And so we've shrugged and put up with random copies of Self and Glamor popping up from time to time.

(Note: this is an entirely different set of confusing circumstances from the ones that have conspired to deliver Sports Illustrated Latino and fliers for Playboy TV en Espanol on my own doorstep.
)

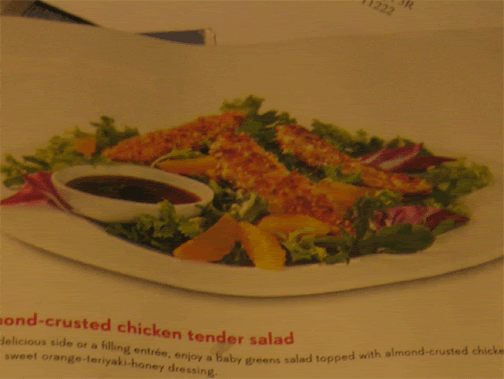
The magazines, or at least one of them, were finally put to use this evening. Mint chanced across a recipe that sounded good, and so I was exiled to the living room while she went about creating it. Now, Mint's preference for cooking solo is the result of both a) wanting the meal to be a surprise, and b) due to the fact that I'm a total jerk in the kitchen if I'm not the one cooking, but it ultimately means that I have no pictures of the how-to, which reads something as follows.

:

1/4 cup Kikkoman Teriyaki Marinade
& Sauce

1/4 cup olive oil
2 tbsp honey

2 tbsp vinegar
1 tsp freshly-grated orange peel


1 package tofu

1 egg

1 tbsp Kikkoman Teriyaki Marinade & Sauce

1/2 cup flour

1/2 cup Kikkoman Panko Bread Crumbs

1/2 almonds, chopped

2-3 tbsp veggie oil

6 cups mixed salad greens

2 oranges, peeled and separated


To make dressing, whisk together teriyaki sauce, olive oil, honey, vinegar, and orange peel. Reserve in bowl.
Slice tofu into 1/2-inch cutlets; season with pepper. In shallow bowl, beat egg with teriyaki sauce until well blended. Place flour in a shallow dish; combine bread crumbs in another shallow dish. Dust both sides of tofu with flour, then dip into egg mixture, and finally coat with almond mixture. In 12-inch skillet, heat 2 tbsp veggie oil over medium-high heat. Add tofu and cook 4-5 minutes, or until golden brown, adding oil as needed. Arrange tofu cutlets on mixed greens with orange slices. Serve with orange-teriyaki-honey dressing.

A faithful reinvention!

Examining the magazine photos, you might notice this recipe has been adapted to use tofu instead of chicken. Examine a little bit closer (or, hell, just read the above list of ingredients), and you'll notice this recipe was actually an advertisement for Kikkoman. I'd say they did a pretty good job, since Mint purchased not only the Teriyaki Marinade but also the recommended Kikkoman-brand bread crumbs. Well done, marketing department. Well done. Only, Mint foiled your evil plot with the chicken farmers by switching to tofu! Ha!
How does bitter defeat taste, chicken farmers? From over here, I'd say it tastes pretty good.

Mint also purchased one pint of Tofutti vanilla ice cream, which is not an ingredient in almond-crusted tofu, but is most certainly an ingredient in root beer floats. Of course, I would be remiss if I did not mention that making said root beer floats was inspired by an A&W commercial. Children of the marketing age, unite! Your root beer floats await! And they're delicious.

Thursday, May 31, 2007

Tomato Sauce, v. 3.0

I CANNOT PRAISE this recipe enough. If the price, questionable nutritional value and bland taste of bottled tomato sauce is getting you down, then you really need to consider this recipe for red sauce as passed down through the Giacchino family. I'm revisiting this point because one thing was made clear to me today: the importance of basil.

First, however, I want to remind people how cheap and easy this all is. Can of
Sclafani crushed tomatoes: $1.99; fresh basil: $2.50 per bunch; and one measly, single carrot: $0.25. This is what I'm assuming most people would need to purchase on the way home, where I suspect olive oil, garlic, salt, black pepper, crushed red pepper, and perhaps an onion are already waiting (onion optional). Now, $4.75 is what one might expect to pay for a decent pre-made bottle of basic red sauce, so this is not bad. Buy a couple extra cans of tomatoes, make a large batch, freeze a few containers, and you can see how this quickly becomes quite economical.
Garlic, basil, and onion--partners in tomato sauce deliciousness

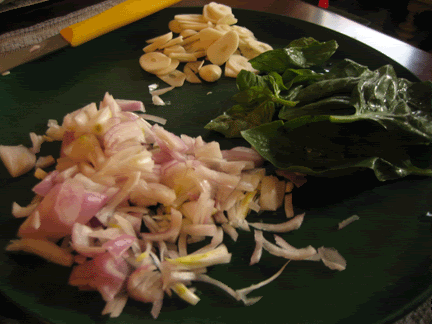
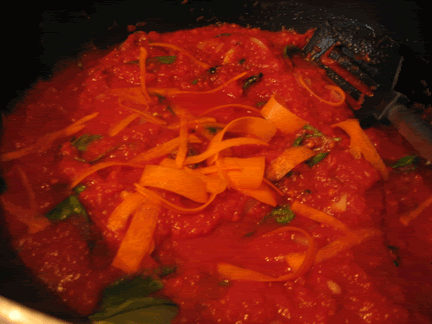
And once you've procured your ingredients, the actual cooking part is stupid-easy. Anyone who can wield a knife is capable of slicing garlic, an onion, shaving a carrot, and roughly chopping a few leaves of basil. Just keep the heat low, lightly fry your garlic, onion, and a bit of basil in the olive oil, then dump in the rest. Let sit for an hour. Stir occassionaly. This is not daunting.

Combine, stir, and let simmer

Most importantly, and this is the reason I've dredged up the topic once again, you really do need fresh basil. This point is
inescapable. We discussed the results using dried basil in my second experience with this recipe, and while the sauce was certainly edible it was lacking that sweet, savory flavor that makes fresh tomato sauce really yummy. If the price of basil turns you off, then buying a bunch and making a large batch, as mentioned above, is really the thing to do.
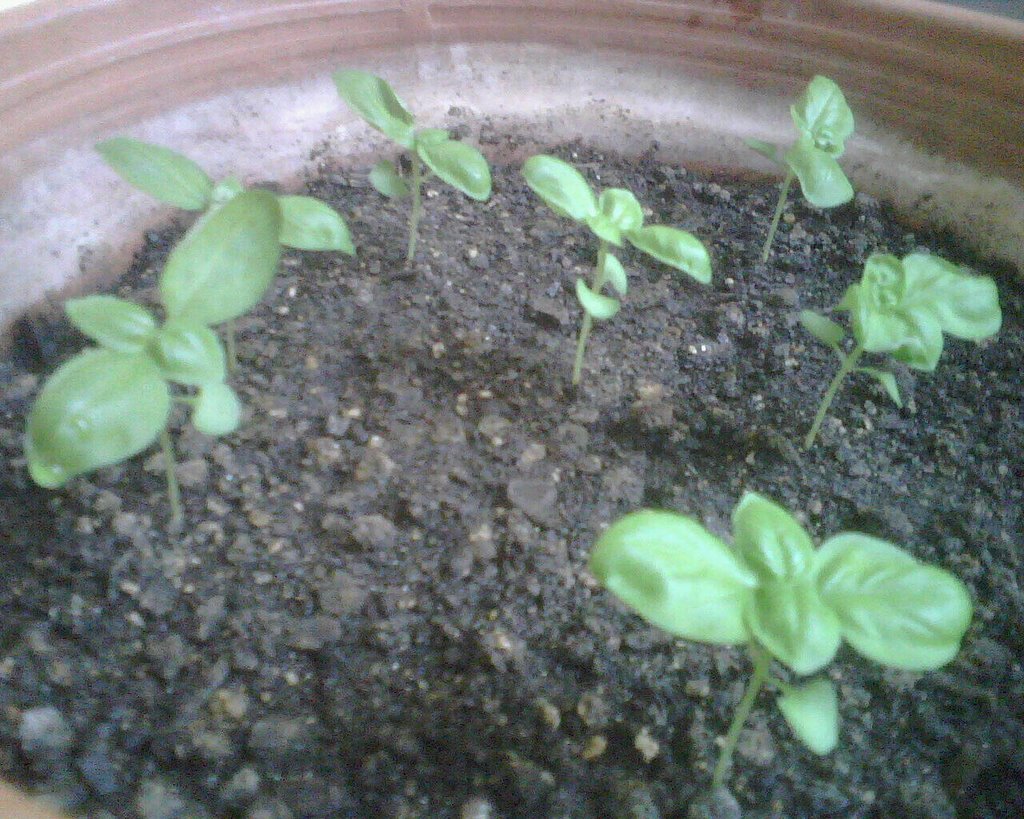
Keep it cheap by growing your own basil

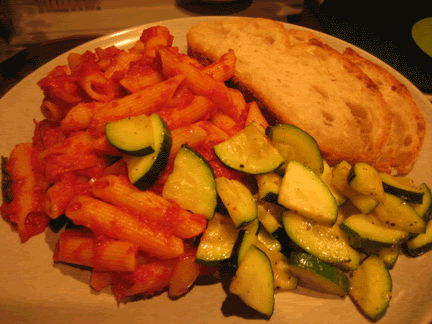
You can use this nicely as a base for other ingredients, too, like cheeses or meats. Ours was simply poured over penne and served up with some sauteed zucchini. Aaron, who stopped by for some eats, was rather amazed that it was so easily homemade. Indeed it was.